CBO Request New TA
The user needs to be logged in as a CDC Directly-Funded Community-Based Organization (CBO) user.
Request a new Technical Assistance (TA) from the dashboard.
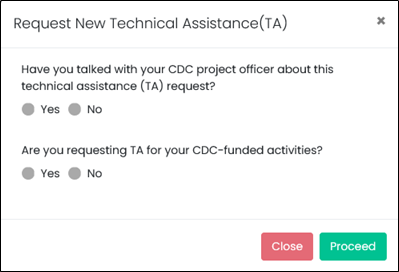
- In the Request New TA box, click the Add button.
- The Request New Technical Assistance (TA) dialog box displays.
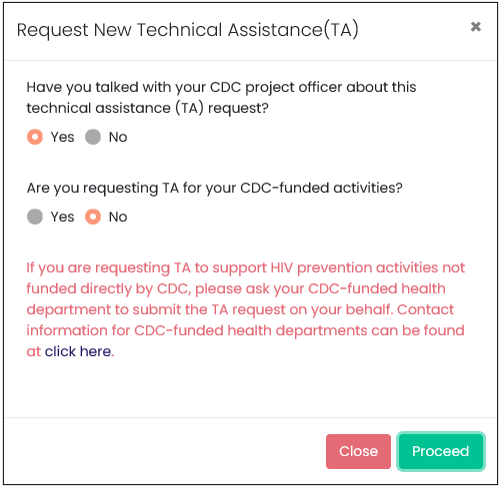
- Once you answer both questions, click the Proceed button.
- Select an answer for the question, “Have you talked with your CDC project officer about this technical assistance (TA) request?
- If Yes is selected, you can move forward with creating a new request.
- If No is selected, you can move forward with creating a new request.
- Select an answer for the question, “Are you requesting TA for your CDC-funded activities?
- If Yes is selected, you can move forward with creating a new request.
- If No is selected, the application will not allow you to move forward and you will have to contact the CDC-funded health department for assistance with submitting the request.
- The Request for a New Reactive TA page displays.

Note: A request number is generated; make note of this number.
- To view the New Request Details, click the plus (+) sign.
- The New Request Details display.
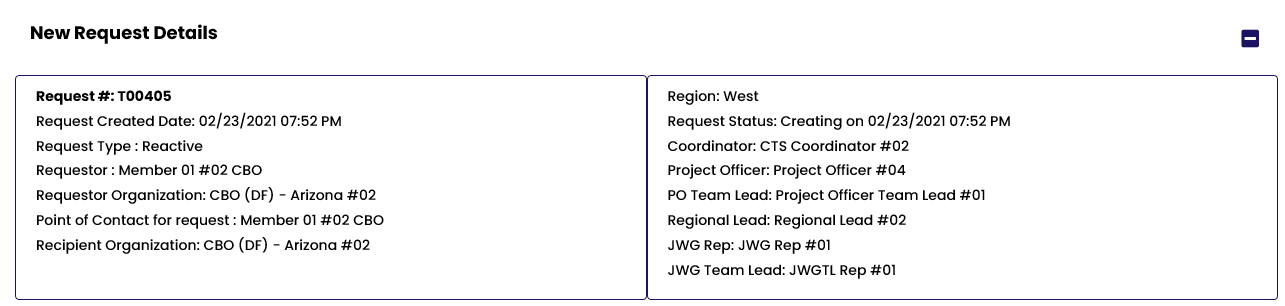
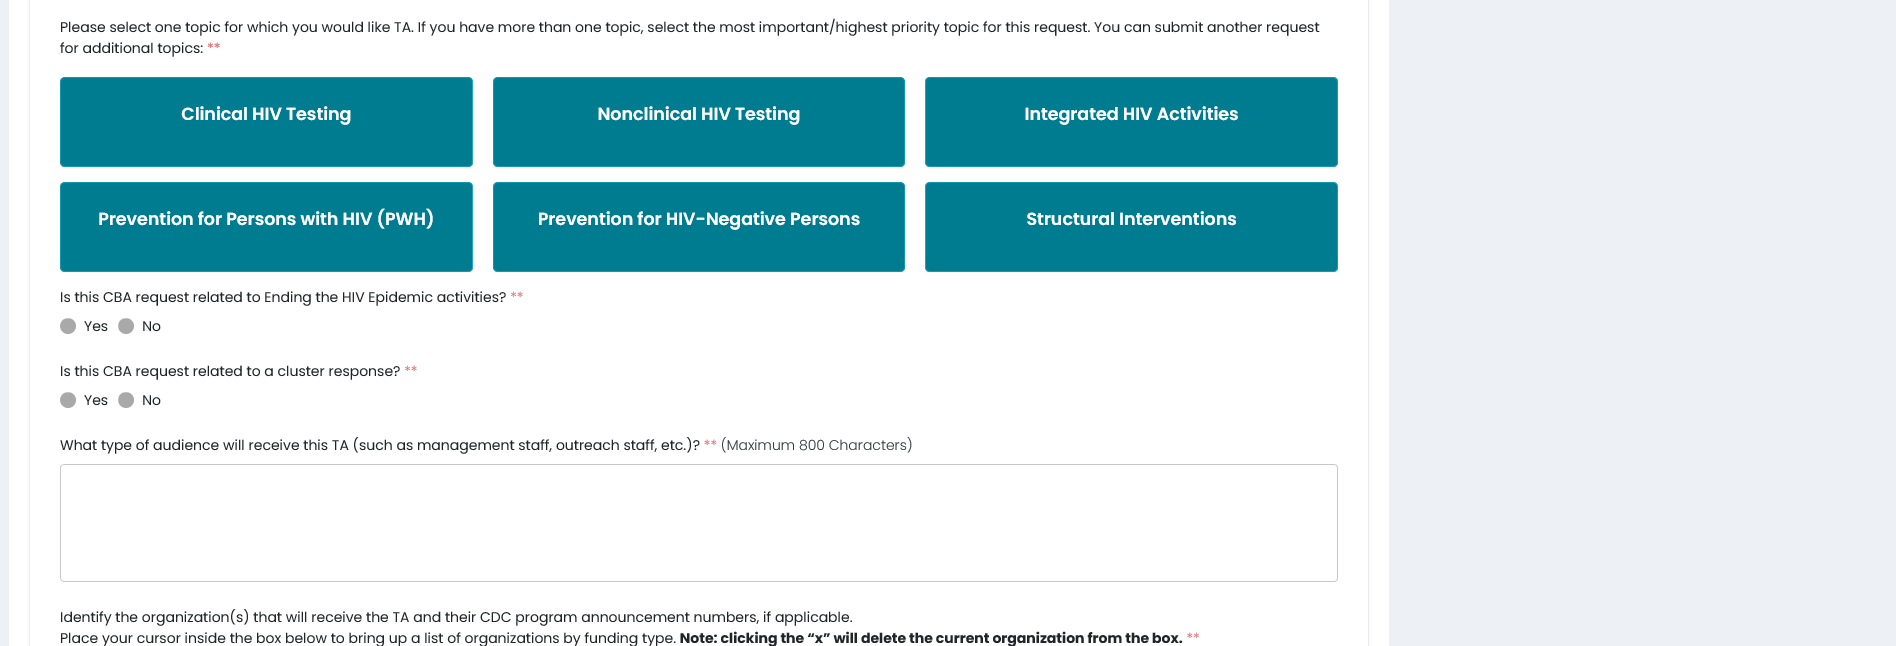
- To complete the request, answer the required questions (noted with double asterisks **).
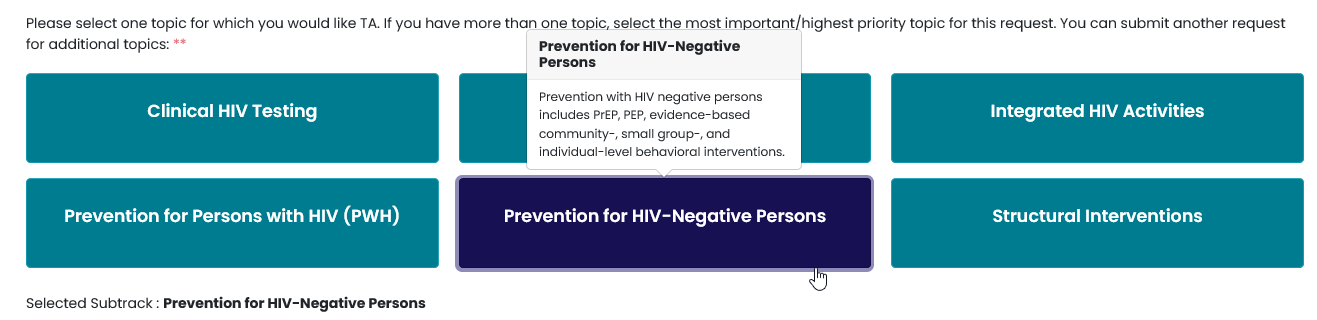
- Select a subtrack topic for which you would like technical assistance (TA).
- Hover over any of the buttons for additional information on a subtrack.
- Only one subtrack can be selected per request.
- Once a subtrack is selected it changes colors and will display below the buttons.
- Answer the remaining required questions (noted with double asterisks **).
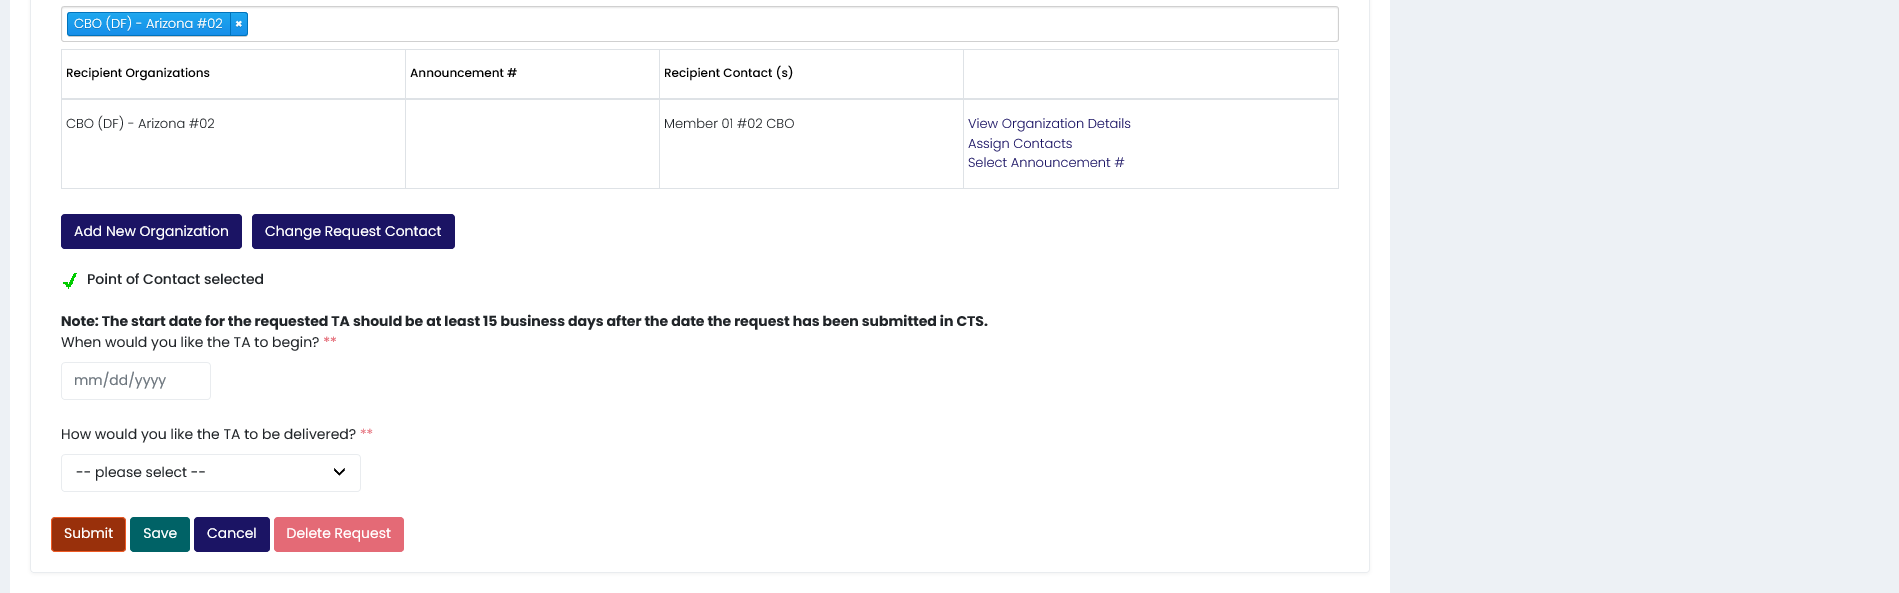
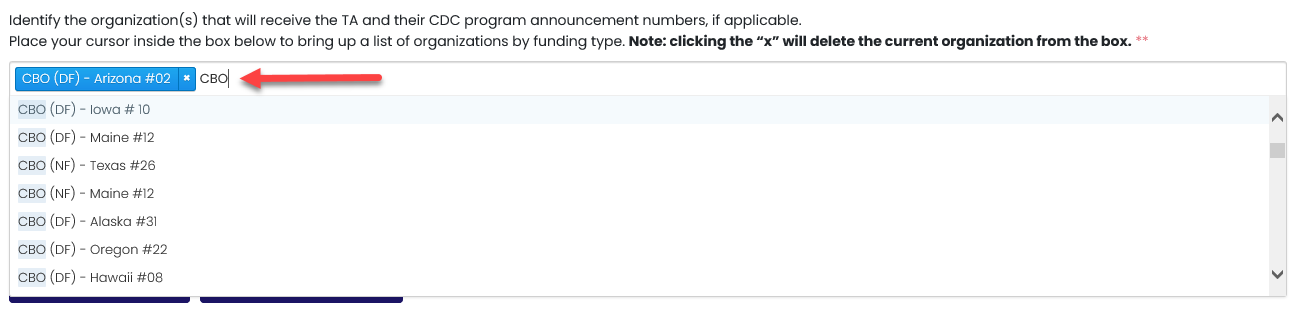
- Identify the organization(s) that will receive the technical assistance (TA).
Note: The Community Based-Organization (CBO) of the logged-in user submitting the request will always display in the organization field.

- To delete an organization from the field, click the x next to the organization name.

- Place your cursor inside the textbox and a list of organizations will display.
- You can type in the name(s) of the recipient organization or you can select them from the list.
- Click outside of the organization field to close the list.
Note: A Directly-Funded CBO organization needs to be included as a recipient if an Indirectly-Funded CBO organization is added as a recipient.
- To add an announcement number, click the Select Announcement # link.
- The Select Announcement # dialog box displays.
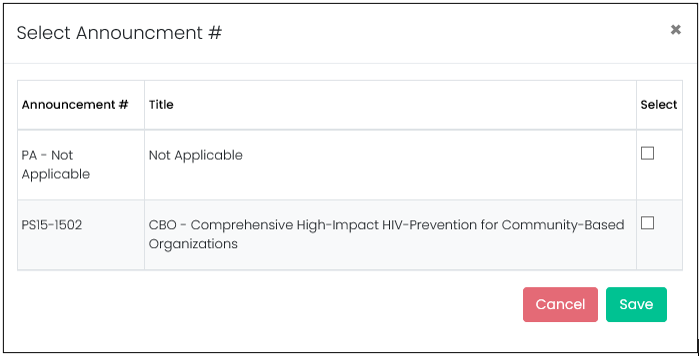
- Select an announcement number and click the Save button.
- To add a new organization, click the Add New Organization button.
Note: Before adding a new organization, check the list of existing organizations to confirm the organization you are about to add does not already exist in CTS.
- The Add New Organization dialog box displays.
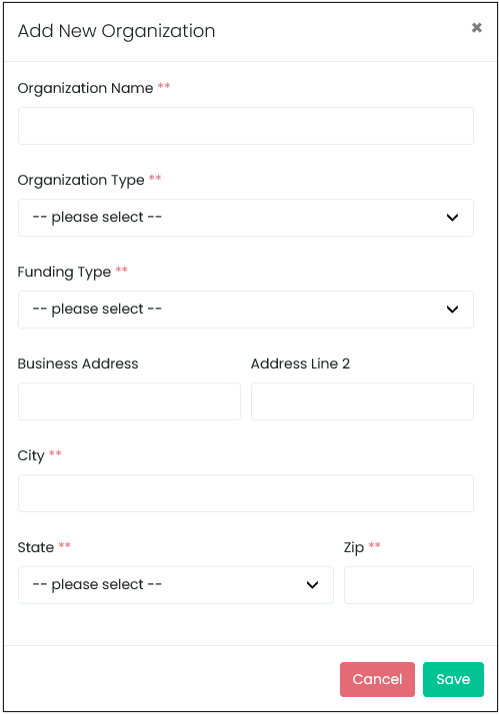
- Answer the required questions (noted with double asterisks **) and click the Save button.
- The new organization displays in the recipient organization section as seen in the image below.

- Click the Assign Contacts link for the organization you just added.
- The Assign Contact dialog box displays.
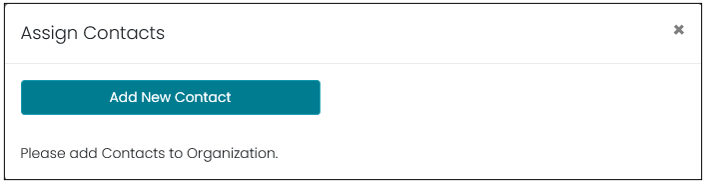
- Click the Add New Contact button.
- The Add a New Contact dialog box displays.
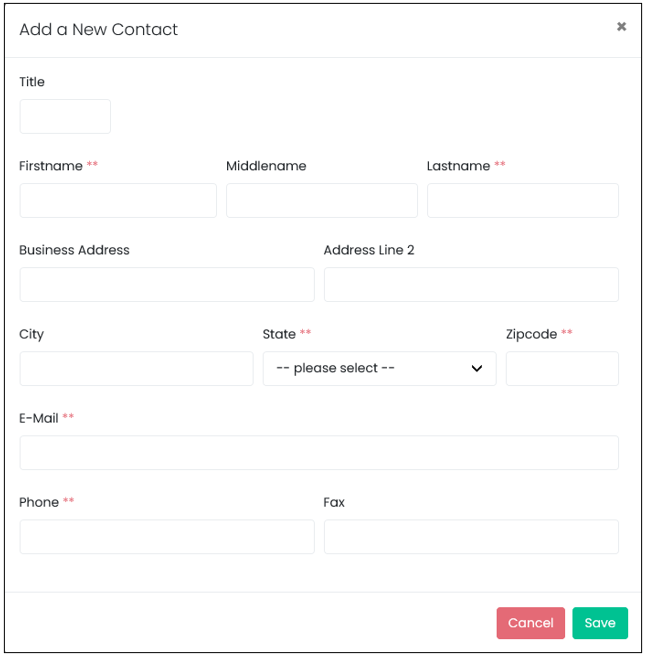
- Enter the required information (noted with double asterisks **) and click the Save button.
- The Assign Contacts dialog box displays.
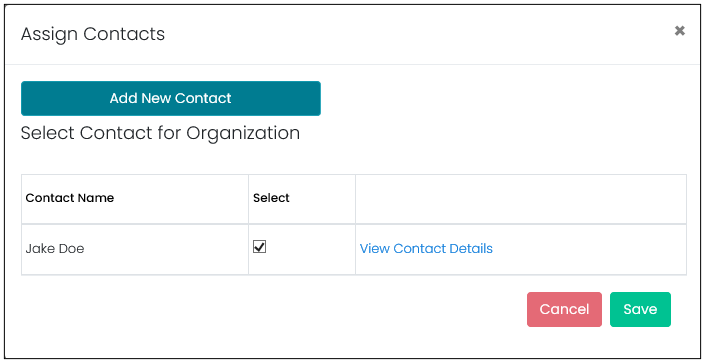
- The new contact name will automatically be selected. Click the Save button.
- The contact is added to the organization and can be seen in the Recipient Contact(s) column.
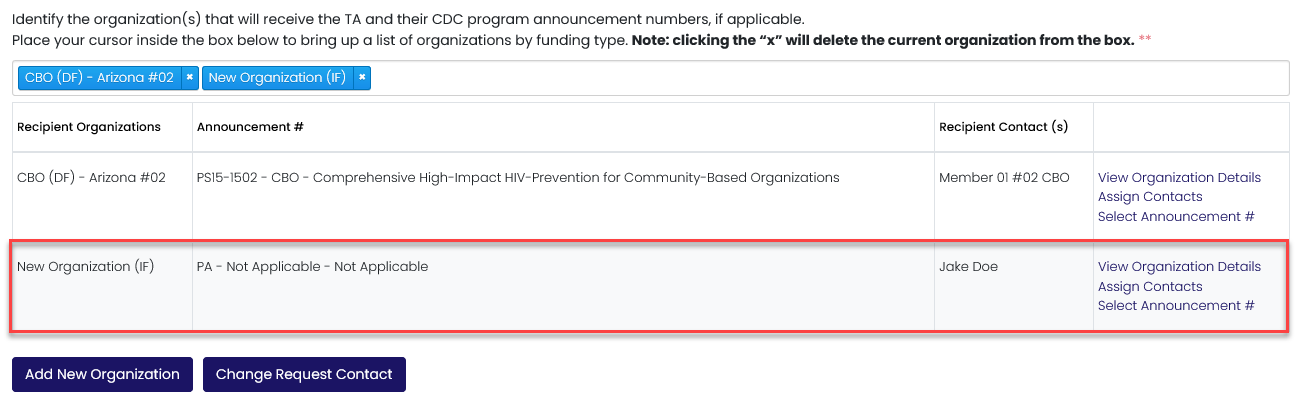
- To assign a different Point of Contact (POC), click the Change Request Contact button.
- The Change Request Contact dialog box displays.
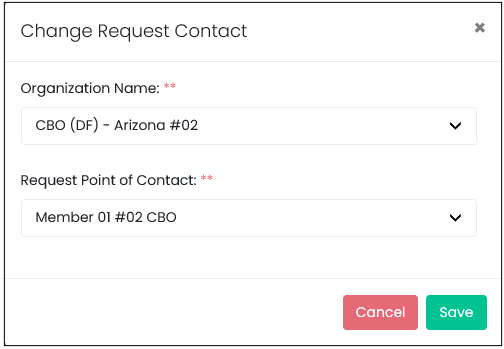
Note: The Directly-Funded CBO organization displays by default.
- Select a name from the Organization Name drop-down list.
- Select a name from the Request Point of Contact drop-down list.
- Click the Save button.
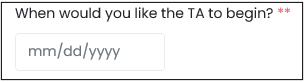
- Click in the date field to select a date from the calendar or enter a date.
- The start date for the request should be 15 business days after the date the request has been submitted in CTS.
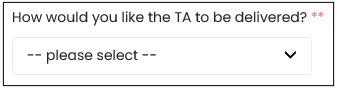
- Select an option from the drop-down list to the question, “How would you like the TA to be delivered?”.
Note: The request can be saved even if the information provided for this page is incomplete. Return later and complete the request.
- Click the Submit button.
- The Success message displays.
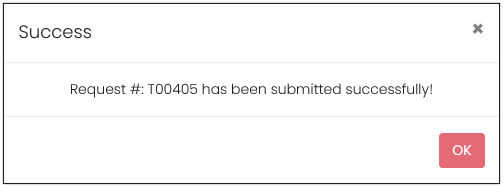
- Click the OK button. The box closes and the dashboard displays.